Creating A Windows XP Recovery Console CD Image
Sooner or later, every XP user faces the moment when he or she needs to access a system in a low-level maintenance mode to fix some kind of problem with the operating system itself.
Perhaps the system boot record became corrupted, or perhaps you simply need to restore a system file that can't be manipulated while the system is running, or maybe you need to disable a system service that is causing problems with Windows.
In these kinds of situations you will need to boot the computer into a mode that allows for manipulating the installed operating system in its native form, but without the entire operating system being active and running.
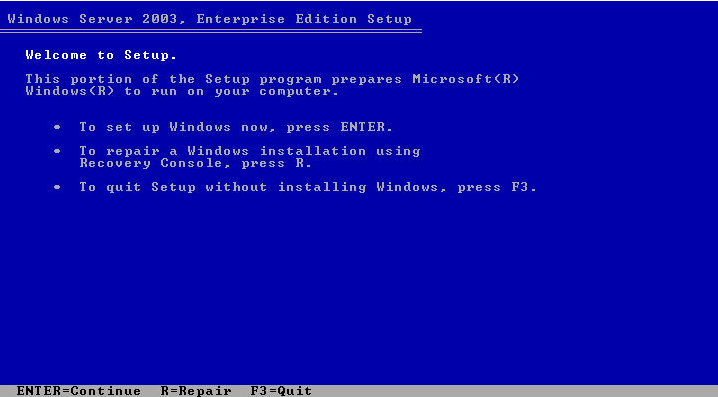
Thankfully, Microsoft provides a lightweight tool called Recovery Console on the installation CD for use in these kinds of situations. Just insert the installation disc, boot the system, press the "R" key when prompted, and the recovery tool will try to locate an existing Windows installation. If one is found, you will be prompted to login with an administrative user account for that installation, and will then be able to perform a variety of system-level recovery tasks from within the thinned-down command prompt, using Windows' own character-mode tools.
The Recovery Console can also be installed onto the system drive, in parallel to the operating system, so that it can be used without the CD. This article by Fred Langa talks about how to do this.
Another option is to put the Recovery Console onto a general-purpose, multi-boot rescue CD, along with all of your other system recovery tools (see this article for background information on building a general-purpose system recovery CD).
The easiest way to do that is to simply copy the contents of the installation CD into the rescue CD's layout, but since the Windows XP installation CD uses about 600 MB, there wouldn't be much room for anything else. However, if you are willing to get your hands dirty, it's possible to whittle the setup files down to the base essential components needed for just the Recovery Console to run, which collectively requires less than 10 MB of space.
Judging from what I've found on the Internet (or rather, the lack thereof)—not to mention my own difficulties in trying to get this working—it seems that this is a relatively unknown subject area, so I'll walk through the process in this article.
Before we get too far into the weeds here, it's important to make note of some important technical issues. For one thing, the Windows XP boot process for CDs is quite a bit different from and entirely incompatible with the boot process that is used for hard drives and floppy disks.
For example, the "normal" XP boot loader that lives in the boot sector of a hard drive or floppy disk starts by looking for a file called ntldr in the root directory of the current file system, which in turn reads the contents of the boot.ini boot menu control file, and then follows whatever course of action was specified by the user's menu selection.
However, Windows XP uses a different boot loader for CD media, which does not use the ntldr or boot.ini constructs. Instead, the CD boot loader looks for a file called setupldr.bin in the i386 subdirectory, and setupldr.bin is just the CD-specific version of the system installation program. On top of all that, ntldr does not have any kind of native support for ISO 9660 file systems, so it can't be used on CD media.
What this all means is that you cannot just copy the contents of an installed Recovery Console from your hard drive to a CD and expect that version to be usable. For one thing, the ntldr boot image cannot be used on CD media. Meanwhile, the only XP boot image that does understand CD media has an embedded system setup program. In sum, the only way to get a skinny version of the Recovery Console onto a custom CD is to copy the necessary files from an installation disc to your rescue media.
What You Need
The basic strategy here is to get the minimum essential set of Windows XP setup files copied to a hard drive, and then copy those files to a CD image or disc. The easiest way to do this is to ask Windows to reinstall the operating system, since this causes only the base setup files to get copied to the drive. But unfortunately it also causes the system's boot.ini to get updated so that the setup program is launched on the next reboot, and then forces the system to be immediately restarted.
In our case, we are going to prevent the system from rebooting, then we'll simply copy the files that we need to our CD file system, and finally clean up after ourselves.
To pull this off, you'll need an installation source that matches the release and service pack level of your installed operating system. For example, if you are running Windows Server 2003 Enterprise Edition with SP1, you will need to have access to the setup files for that same release with the service pack files slipstreamed into the installation media. (Slipstreaming is described in this article by Fred Langa.)
You'll also need a tool that can extract the boot loader from a Windows XP CD-ROM, or you can use one of the existing Windows 2000/XP boot images floating around on the Internet. (Step 11 in Fred's slipstreaming article mentions just such a resource.) You will also need some kind of CD mastering program that can create a bootable disc, or one that can create a multi-boot menuing system.
I also strongly recommend that you use some kind of virtual machine software for the setup and extraction process. You are going to be messing around with system boot files here, and it is terribly risky to use a live system for this kind of stuff. It is very likely that you will accidentally make the system unbootable, and you really don't want to be suffering those consequences. Take my word on this.
I should also point out that there are some pre-made Recovery Console ISO images floating around on the Internet, although I strongly recommend against their use. For one, it's highly unlikely that these will be the same release and service pack level as your own systems. Separately, while I have no reason to doubt the integrity of the authors of those files, I have no reason to trust them either, which is cause enough to avoid using them for the kind of low-level tasks that you will be using the Recovery Console for.
As an aside here, it's really too bad that Microsoft does not provide pre-packaged Recovery Console ISO files as a courtesy to its customers. Although the company does provide downloadable floppy images of the setup files that can be used to achieve the same basic results, those images are not practical for building CD-based recovery consoles. But it would be remarkably easy for Microsoft to build an ISO image for each XP release, and it would probably be better for everybody if people weren't doing what I'm about to describe here.
Installing The Setup Files
Once you have all the necessary stuff assembled, the first step is to install the operating system onto a throwaway drive, using whatever installation media you have available (this can be a CD or a network install, or any other installation source).
You can go ahead and apply any patches you want, but do not let Windows Update apply any additional service packs. The installed OS and the installation media must be at the same service pack level, or else subsequent steps will fail, so if you need to have service packs you'll need to go back and slipstream the installation media as discussed in the previous section.
Once the system is more or less stable, open a command prompt window and navigate to the installation media, and find the winnt32.exe executable (it'll be in the i386 subdirectory). Then run ".\winnt32.exe /noreboot" from the command prompt. This causes the essential setup files to be copied to the system hard drive, while the "/noreboot" parameter tells the setup program not to force a reboot immediately afterwards like normal.
The "Welcome to Windows Setup" screen will appear like the screenshot shown in Figure 1.
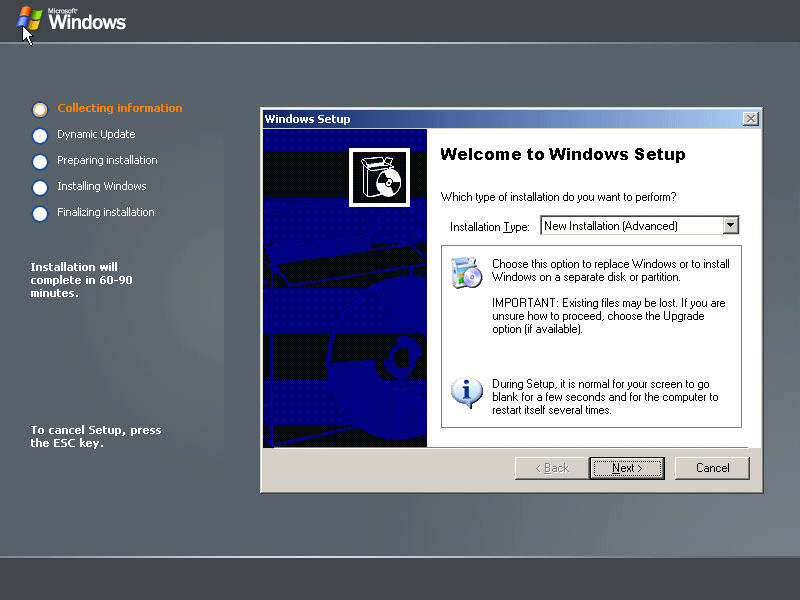
Choose "New Installation (Advanced)" for the installation type in the drop-down box. You will then be presented with the standard end user license agreement, and you may also be prompted to enter a license key.
If you are prompted to reformat the drive for NTFS, choose "no." Since we are going to reuse the installation files for the recovery console, we want to minimize any variables, and the last thing we want is for our recovery console to be reformatting drives on systems we're trying to fix.
Eventually you will be asked if you want to update the installation files. Choose "no," since choosing "yes" here can cause the setup process to look on the local hard drive for update files when setup resumes, and those files probably won't exist on other systems.
Finally, the program should begin to copy the setup files to the root of your hard disk, and then exit gracefully.
Taking What We Need
At this point you should have a directory called $WIN_NT$.~BT in the root of your C: drive, along with some other files that would normally be used by setup when the system rebooted. We need to grab some of these files, and also some of the files from the installation media, and then delete whatever leftover junk remains.
Navigate into the $WIN_NT$.~BT directory, and delete the bootsect.dat, migrate.inf, and winnt.sif files. The bootsect.dat file has information about your local hard drive parameters, and the presence of this file can potentially cause unexpected problems with other systems. The other two files can also cause confusion with the setup process if they are left lying around.
Navigate back to the root directory of the C: drive, and rename the $WIN_NT$.~BT directory to i386.
Create another directory in the root of the C: drive called rcfiles. Move the i386 directory into rcfiles, so that it is now c:\rcfiles\i386, and move the txtsetup.sif from the root of your C: drive to the new c:\rcfiles\i386 directory.
Locate the installation media again. In the root of the installation tree will be two or more files beginning with the characters WIN51. These files tell the setup program what kind of operating system is being used, and are needed for the setup program to start properly. The file names are important. For example, Windows XP Professional with SP2 slipstreamed will have files called WIN51, WIN51P, WIN51P.SP1, and WIN51.SP2. Windows Server 2003 Enterprise Edition with SP1 has files called WIN51, WIN51I, and WIN51I.SP1. You need to copy all of the WIN51* files into the root of the rcfiles directory created in the previous step.
Now move the entire rcfiles directory to the system that has your CD mastering software.
At this point you are done with the setup system. If you used a real disk, or if you want a clean test system for debugging your rescue CD, you'll probably want to clean up the installation drive. To start with, delete the file called $ldr$ in the C:\ directory. If there is a directory called $WIN_NT$.~LS in the root of your C: drive, you can delete that too.
You'll also need to fix the Windows boot.ini file so that Windows boots normally again. First, use the attrib command to clear the system, hidden, and read-only attributes on the boot.ini file. Then copy boot.bak over the boot.ini file (boot.bak was created by the installation process automatically), and then use the attrib command to re-enable the system, hidden, and read-only flags on the new (original) boot.ini file:
C:\> attrib boot.ini -s -h -r
C:\> copy boot.bak boot.ini 1 file(s) copied
C:\> attrib boot.ini +s +h +r
That's it. You should be back to normal on the setup system.
Building The CD
Using your CD mastering software, create a new bootable CD, and add the contents of the rcfiles directory to the root of the CD filesystem. Do not add the rcfiles directory itself, but just the contents of that directory.
As stated earlier, you must use the CD boot sector image from a Windows 2000 or XP CD for the boot sector of your recovery CD to properly launch setupldr.bin. If you are using a multi-boot menuing system like isolinux or CD Shell, you can simply create a menu entry that instructs the main boot loader to chain down to the Windows CD boot loader.
If you are making a self-contained Recovery Console CD, you'll need to point the CD mastering software to the boot sector file. The mastering software should be set for "no emulation," and should have four sectors allocated to the boot image;the screenshot below shows what this looks like in Nero Burning ROM.
Now create the CD or ISO image file, and take the resultant product back to the test machine. You should be able to boot from the CD, and it should automatically start the setup process. Press "R" when prompted, and you should go into the Recovery Console (you can also press "F10" at the first screen to go directly into the console).
The process above should result in a basic setup CD image of about 7 MB that can only run the Recovery Console, and only in its most basic form. You will not be able to install Windows from the resulting CD, and you might also encounter some problems trying to use the Recovery Console on other machines that have different kinds of hardware.
For example, if you ever have to press F6 during normal setup to load a storage driver, you'll need to do the same thing with the Recovery Console. However, you can slipstream those drivers into your Recovery Console build, so that they are loaded by setupldr.bin when the CD starts.
This process is described this article and this article. A fresh copy of txtsetup.inf was placed in the root of your C: drive during the installation process, and you were instructed to put it into the i386 directory in the previous section, so you should be able to find it there if you need it.
Another issue that can arise in some cases is with systems that use different hardware abstraction layers or processor architectures. For example, if your test system used a uniprocessor HAL, you will probably run into problems with systems that use a multiprocessor HAL, and so forth. You can get around this by repeating the installation process on multiple kinds of systems and consolidating the resulting installations.
Another factor to keep in mind here is that you can only put one version of the Recovery Console onto a CD, and you can't have different versions for things like Windows XP Professional and Windows Server 2003, or have different versions of the same release at different service pack levels. This is because all of them will expect to find the setup files in the i386 folder of the CD, but the files for each release will be slightly different, so they cannot coexist.
Some people get around this by installing each of the release-specific consoles into custom directories, and then using a hex editor to change where the CD boot sector image and setupldr.bin look for their files. This is something that advanced users may want to think about, but I won't describe it further.
One other consideration here is that the Recovery Console is somewhat limited by default. However, you can unlock some of its advanced features by editing the registry on each of your machines. Fred Langa describes this process in in this article.
Remember that the Recovery Console tries to access the installed operating system files when it loads, and this includes reading the registry, so this method works even when you boot the Recovery Console from a CD.

Copyright © 2010-2017 Eric A. Hall.
Portions copyright © 2006 CMP Media, Inc. Used with permission.